Once that is done, the actual underpainting phase begins. First, the darkest points are identified and marked with the raw umber. Next, the shadow area is defined. The shadow pass is relatively thin. Next is the light phase, where a lighter tone of the raw umber is applied. Paint is thicker in this case.
Going back and forth the dark and light phase, the painting slowly emerges. I will then apply some white mixed with the raw umber for even lighter tones. Once that is done, I will apply some pure whites to really show the light hitting the face.
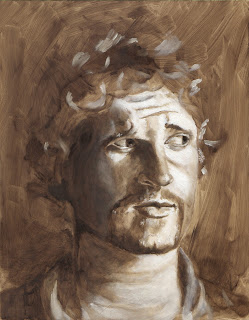
After some back and forth of dark phases and applying white on portions of the face where the light is the strongest, I came to the first underpainting: